


Labelling
What you will need:
Transcript
Getting started
A well-organised labelling system can help you to identify your collection objects easily and with minimal handling.
Ideally, all objects should be marked with an accession number in order to classify them and avoid item loss. For conservation purposes accession numbers should always be reversible and not damage the materials they are written on.
Labelling objects
It is best to be consistent in label positioning. For example, always placing the label on the back inside cover of books. This practice makes it much easier to locate accession numbers and reduce the handling of collection materials. While it is preferable that the accession numbers are easily accessible, it may be important for them to be discreet if the item is going to go on display. If you are numbering an object made from more than one material, choose the most stable or least porous part of it to apply the number.
Your writing should be as small as possible, so that the label isn't obvious when it is displayed. Writing should also be as neat as possible so others can read it. You may want to practise your method before marking real collection objects.
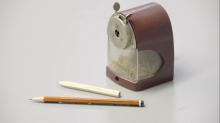
Paper-based materials can be labelled using a soft pencil, such as 2B or 4B, on the reverse using light pressure. Sharpen your pencil, and then slightly blunt the tip to prevent any damage to the paper. A wax pencil may be useful for applying numbers to coated papers.
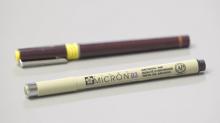
Objects such as wood, glass, ceramics, stone and metals are usually labelled with pen and ink or a quality archival ink pen such as a Pigma Micron or Artline Drawing System pen.
Generally black is preferred given it is light resistant, but it may be difficult to see on dark objects. As drawing pens do not come in white, you can use white ink with a metal nib or an Artline 444 Paint Marker.
Before marking an object
Before writing on the item, it is important to first apply a reversible lacquer to the object so the accession number can be removed if necessary.
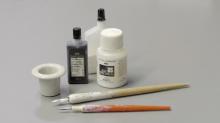
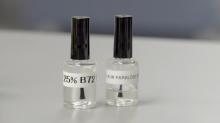
You can buy labelling kits with premixed conservation-quality lacquer from conservation suppliers. These come in small nail polish style containers for ease of application. The kits supply you with two components, Paraloid B72 and Paraloid B67.
For unpainted surfaces, apply a small rectangle of Paraloid B72 to an inconspicuous area of your object. Though allow time for it to dry thoroughly before applying your number. Once this has dried, the Paraloid B67 can be applied over the top to seal the ink. This second layer is not always necessary if your artefact is unlikely to be affected by surface abrasion. It is highly recommended to use a topcoat on smooth and shiny surfaces such as glass, as accession numbers can wear away during handling.
If your object is painted, use the Paraloid B67 as the initial layer as it is less likely to cause damage.
It is possible to mix your own Paraloid B72 or B67 lacquers as both these products come in bead form from conservation suppliers.
What not to do
Do not use alternatives such as correction fluid, nail polish or adhesive labels as they can all cause damage to collection materials.
In particular solvent-based lacquers should never be applied to plastics or rubber as they can cause severe damage. The safest way to label plastics and rubber is with a tie on tag. If a more permanent number is required, this can be done with a fine wax pencil or a water-soluble All-Stabilo pencil.
Handy hints
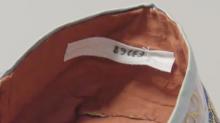
Textiles are normally labelled by hand stitching on a tag made from washed cotton tape. The numbers are written using archival ink pen. Turn in any raw edges. Then use a fine needle and a fine soft cotton thread, preferably matching the background colour of the textile to stitch the label to the textile using one or two stitches at either end. It is helpful to always stitch the number in the same place for each type of textile.
Making sure you label your collection correctly will help you keep your collection well organised and limit the chance of your items accidentally getting damaged.
Thanks for listening.