Freezing Objects
What you will need:
Transcript
Getting started
Freezing is one of the simplest, cheapest and safest methods to kill insects in your collection materials.
It is lethal to all life stages of insects, including their eggs.
I am going to show you how to freeze collection items in case of an insect problem.
What freezer
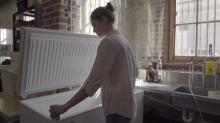
Firstly, ensure you have a suitable freezer. A domestic chest freezer is fine but it should not have an auto defrost cycle, and must be able to reach -20 degrees centigrade or below.
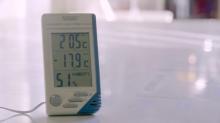
The temperature of your freezer can be checked with an inexpensive indoor/outdoor thermometer.
The freezer should already be on and cooled to this temperature before placing your objects inside.
The freezer should be clean and not contain food or other items, which could contaminate your collection materials in the event of a power failure. If you have a large number of items to be frozen you may need to hire a commercial facility or check if another institution can help.
Before freezing
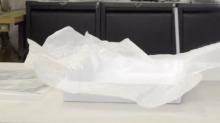
To begin, collection items should be wrapped with acid-free tissue or washed cotton. Delicate items can be placed within a cardboard box for support. The inclusion of organic materials such as these acts to buffer humidity changes.
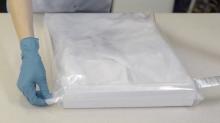
The item should then be placed in a close fitting polyethylene bag or well wrapped with polyethylene film. The plastic will prevent condensation from forming on your object when it is removed from the freezer.
The plastic should be sealed as well as possible. If you have a heat sealer this can be used to prevent moisture ingress. Although, this is not essential. I have used packing tape to seal this bag for freezing. Zip lock bags also work well for small items.
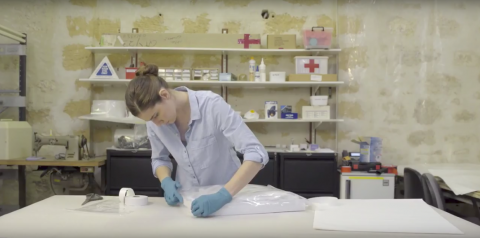
Remove as much air as possible, but there is no need to try to suck the air out as this could squash the objects.
Loading the freezer
Carefully place the item in the freezer. Heavier items should be placed at the bottom to avoid damaging the more delicate items.
Avoid overloading the freezer as putting in too many items at once will slow down the rate of cooling. Keeping the freezer at a third of its capacity is a good guideline.
Using the freezer baskets or perforated trays to support the items will also help to promote air circulation and increase the rate of cooling.
In the freezer
Freeze the objects for two weeks. Do not open the freezer at all during this time.
What not to freeze
Freezing is generally safe for most objects made from organic materials, such as textiles, paper, wood, and leather. However, there are some collection materials that should not be frozen.
This includes:
- Very fragile items which may be broken in the process.
- Paintings or painted items.
- Objects under tension (for example, drums).
- Lacquered or inlaid wooden objects.
- Rubber, plastic and wax.
- Glass.
- Old photographs.
- Audiovisual materials.
Freezing risks
Freezing does pose a damage risk to glued joints or the loosening of the bonds between composite materials. These risks can be minimised through carefully handling when removing items from the freezer. Always remember that material coming out of the freezer will be more brittle than normal.
After removal from the freezer the objects should be left to acclimatise to room temperature for 24 hours before it is removed from the bag. This means that condensation will form on the bag or wrapping materials rather than your object.
After freezing
The objects should be brush vacuumed before being returned to the storeroom, as insect debris is highly attractive to other insects. In addition, if you see any insect debris in the future, you will know it is a new infestation.
Handy hints
Freezing can also be used to temporarily store wet or mouldy items if you are not able to treat them right away. In this instance please consult a conservator before removing these items from the freezer.
Thanks for listening.


