Fruit Tin Label
U. Broeze-Hoernemann
Condition
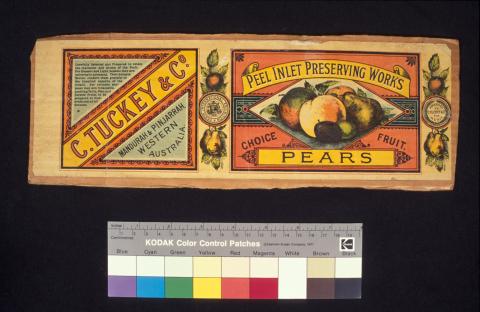
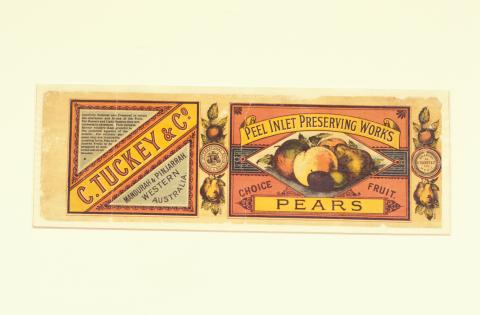
The coloured waxed paper label from the C Tuckey and Co. Peel Inlet Preserving Works was fully adhered to a backing that had been cut from a commercial cardboard box. The label had numerous tears, one of which had separated it into two pieces. There were also areas of loss, creases, surface abrasion, dirt and stains present.
Treatment Proposal
The proposed treatment of the label was drawn up as follows:
- document the label’s condition;
- surface clean the label while still adhered to the cardboard;
- remove the cardboard backing;
- de-acidify the label if necessary;
- depending on the condition of the label, strengthen it by applying a Japanese tissue backing; and
- encapsulate the label in mylar.
The cardboard backing was removed because its acidic nature would accelerate deterioration of the label. The methods used to remove backings are determined by the nature of the backing material.
The decision to reinforce the label with Japanese tissue could be made only after determining the fragility of the isolated label. Such decisions should never be taken lightly as they involve the introduction of a new component, thus changing the integrity of the object.
Encapsulation allows the label to be handled without touching the label itself while still allowing air circulation around it.
Tests Carried Out
The pH of the label was 4.6.
Stabilities of the colours and of the waxed surface were tested in water and calcium hydroxide solution. All appeared to be stable in both media.
Treatment
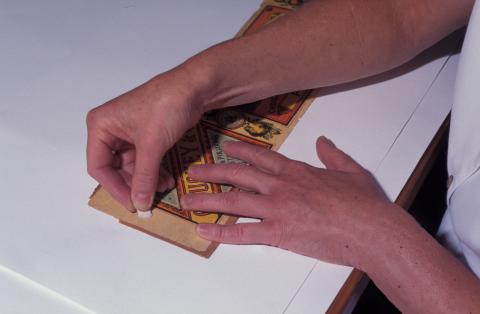
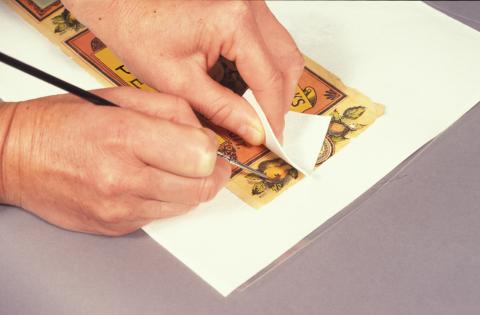
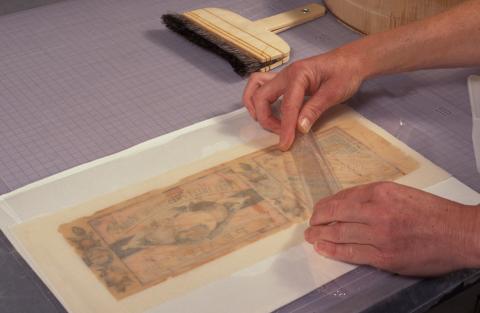
The treatment of the label is described below and in the accompanying images (Figure 2). The surface of the label was dry cleaned using a thin flexible slice of a high quality soft eraser.
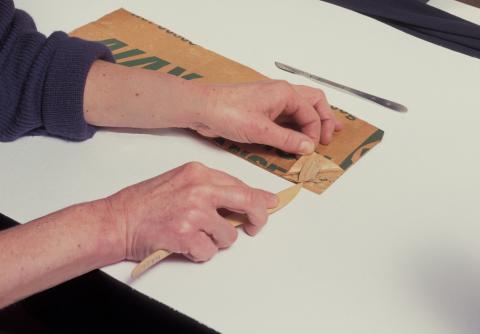
The cardboard backing was thinned initially by removing it layer by layer with a flat wooden spatula until only one thin layer remained. The remaining layer was moistened section by section with damp cotton wool until it was soft enough to be scraped off with a scalpel. This type of backing removal is not always possible. If yellow strawboard has been used as a backing, do not introduce moisture as it is likely to irreversibly stain any attached paper.
The label was washed several times in distilled water until the water remained clear, de-acidified for 30 minutes in a calcium hydroxide solution buffered to pH 9 and then air dried on a Reemay® support.
Since the object remained fragile and because of the sheer number of tears and creases, a Japanese tissue backing was applied for added stability. Kozo tissue paper was used. A piece larger than the label was pasted to the back of the label using a thin and even layer of wheat starch paste.
The reinforced label was dried between blotting paper lined with Reemay® and under a sheet of glass as weight. Blotters were changed as they became damp. Reemay® is a spun polyester which prevents adhesion of the object to the blotting paper during the drying process. After drying, the Japanese tissue was trimmed to a size slightly larger than the label.
After a paper object has been exposed to moisture, such as in the procedures described above, it is very important that it is dried thoroughly. The drying process usually takes several days but may take more than a week in some cases.
When dry the label was encapsulated in mylar. Acid-free double-sided tape was used to adhere two sides of the mylar, thereby allowing free air circulation and easy access should the label have to be removed. A strip of buffered Archive Text paper (pH 8.5) was inserted behind the label to counteract any residual acidity.
A window mount was cut from buffered 100 % rag mat board (pH 8.5) and the above described ‘parcel’ was held in place by four photo corners handmade to size from mylar and double-sided tape. This type of storage supports the object and facilitates handling and display at the same time.
Figure 2: Fruit tin label.
(a) Before treatment.
(b) Dry cleaning with sliced flexible eraser.
(c) Removal of backing using a wooden spatula.
(d) Spot testing for colour fastness using a fine brush, water and blotting paper.
(e) Application of backing.
(f) After treatment. Stored in a window mount for display, handling and storage.


