


Box Making
What you will need:

Transcript
Getting Started
In this video, I am going to show you how to make a simple box to appropriately store your collection item.
It is worth mentioning that pre-made boxes made from acid-free cardboard or polypropylene are available from conservation suppliers should you lack the time and staffing needs to create your own.
Pre-made products can be more expensive and may only come in a limited range of sizes, but they do offer modular solutions and can make your life a lot easier as a collection manager.
These boxes are often not sufficient to support heavier items so you will need to understand their benefits and limitations.
You will need
With that in mind, to create your own box you will need the following materials:
- Acid-free blue/grey board. This is available through conservation suppliers. The board comes in two thicknesses – 3mm and 5mm. It is easier to work with the thinner board, but the thicker board should be utilised when making boxes for heavier objects.
You will also need:
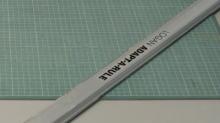
- A long metal ruler.
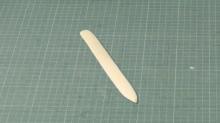
- A bone folder.
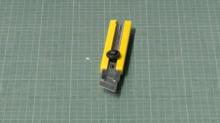
- A sharp, good quality snap blade knife.
- A hot glue gun.
- A cutting mat.
- A pencil for marking.
Define the size of the box
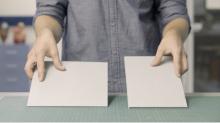
First, work out the dimensions of your box by measuring the object’s dimensions.
The finished product should allow for extra space and padding around the object, though most storage areas have limited space so don’t make the box too big.
Plan your box
Next, draw a rough plan of your box on a piece of paper. It should look something like this (box and lid template attached).

Write in your three dimensions. On one direction the board will measure the width plus twice the height. The other direction will be the length twice the height. Leave a bit of extra space to allow for fold lines. This extra space should be around the thickness of the board.
Transfer your paper plan to the blue/grey board, marking the lines with the pencil. You will notice that the board has parallel lines on it corresponding to the corrugations. It is best to have the longest dimension of the box running along these lines, as the board is strongest in this direction.
Cutting the box
As the saying goes, measure twice and cut once. Blue/grey board is expensive so you don’t want to make a mistake.
Next cut out the outer dimensions of the box to produce a rectangle or square.
Mark the flaps on your box and cut them out. Measurements aren’t so critical here, but it pays to still be careful.
Constructing the box
Score along the fold lines in your box with a bone folder or a blunt ruler. Then begin folding up your box.
Use hot glue to secure the flaps of your box. The glue has to be applied quite thickly, and the box folded quickly so that it does not set before you have finished the assembly.
Be aware that hot glue can cause severe burns so wear gloves if you need to.
A cheap alternative to using a hot glue gun is to use neutral pH PVA adhesive. This does take a bit longer as you need to clamp and weight each half of the box separately. You can use clothes pegs, spring clips or small plastic clamps to secure the box while the glue dries.
Making a lid for your box
To make the lid of your box measure the length and width of the top of your box.
Again you will need to add a bit extra to the dimensions so as to account for the width of the card and the fold lines. The height will vary according to the size of your box but is generally at least 50mm.
Your lid will be constructed in the same way as the body of the box.
When gluing it together, it is best to place it on top of the box to ensure a good fit.
Helpful hints
It is worth noting that sometimes a delicate item may be damaged if it were to be lifted out from the top of the box. When this is the case, you could place it on a suitable support tray, and leave one side of the box unglued. This side of the box can then be secured with cotton tape ties or adhesive Velcro.

Ultimately box making is all about making sure your measurements are well thought through. If you have a good plan of attack you will generally end up with a solid box with which to store collection objects.
Thanks for listening.